Spider Peanut Butter Cookies
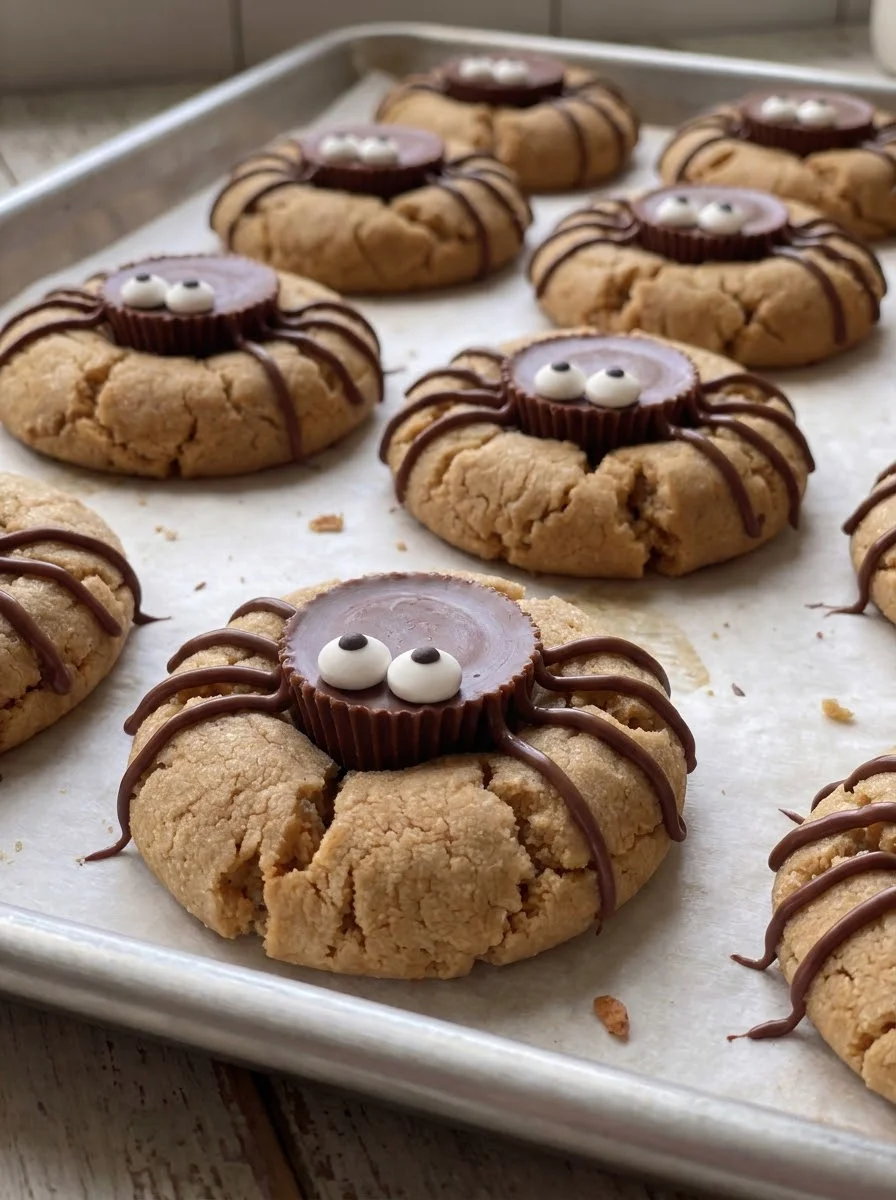
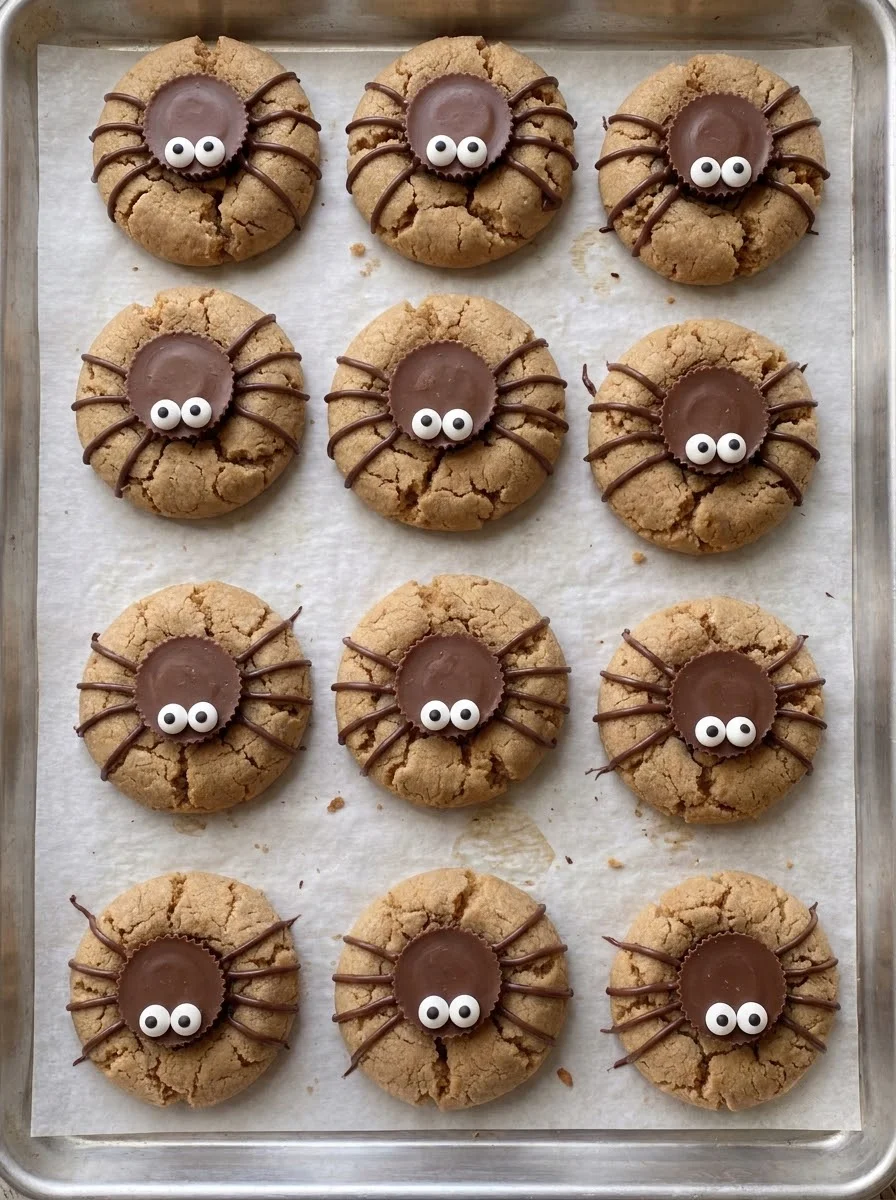
These Spider Peanut Butter Cookies are the ultimate festive treat! With their adorable spider design featuring a miniature peanut butter cup and candy eyes, these cookies are perfect for Halloween or any fun occasion. The combination of creamy peanut butter and chocolate will delight both kids and adults alike, making them a hit at parties or as a sweet snack at home.
Why You’ll Love This Recipe
- Easy to Make: With simple ingredients and straightforward steps, you can whip up these cookies in no time.
- Adorable Presentation: The spooky spider design is not only fun but also a great conversation starter at any gathering.
- Delicious Flavor: The rich taste of peanut butter paired with chocolate makes these cookies irresistible.
- Versatile for Occasions: Perfect for Halloween, school parties, or just a fun family baking day.
- Kid-Friendly Activity: Involve your little ones in decorating these cookies for a memorable family experience.
Tools and Preparation
Before diving into making your Spider Peanut Butter Cookies, gather your essential tools to ensure a smooth baking process.
Essential Tools and Equipment
- Electric mixer
- Mixing bowls
- Baking sheets
- Parchment paper
- Wire rack
- Small piping bag or plastic zipper bag
Importance of Each Tool
- Electric mixer: Saves time and ensures the ingredients are well combined for a fluffy dough.
- Mixing bowls: Allows for easy mixing and separation of wet and dry ingredients.
- Parchment paper: Prevents sticking and makes cleanup easy.
- Wire rack: Helps cool the cookies evenly after baking.
Ingredients
These festive peanut butter cookies feature a miniature peanut butter cup pressed into the center, decorated with candy eyes and chocolate drizzle to resemble a playful spider, perfect for Halloween or fun treats.
For the Cookie Dough
- 1/2 cup (1 stick) unsalted butter, softened
- 1/2 cup granulated sugar
- 1/2 cup packed light brown sugar
- 1/2 cup creamy peanut butter
- 1 large egg
- 1 teaspoon vanilla extract
- 1 1/2 cups all-purpose flour
- 1 teaspoon baking soda
- 1/2 teaspoon salt
For the Decoration
- 24 miniature peanut butter cups, unwrapped
- 1/4 cup semi-sweet chocolate chips
- 48 candy eyes
How to Make Spider Peanut Butter Cookies
Step 1: Preheat the Oven
Preheat your oven to 350°F (175°C) and line two baking sheets with parchment paper.
Step 2: Cream Together Ingredients
In a large mixing bowl, cream together the softened butter, granulated sugar, and light brown sugar using an electric mixer until light and fluffy.
Step 3: Add Wet Ingredients
Add in the creamy peanut butter, egg, and vanilla extract. Beat until everything is well combined.
Step 4: Combine Dry Ingredients
In a separate medium bowl, whisk together the all-purpose flour, baking soda, and salt.
Step 5: Mix Dry with Wet Ingredients
Gradually add the dry ingredients to the wet mixture. Mix on low speed until just combined; avoid overmixing to keep your cookies soft.
Step 6: Form Cookie Dough Balls
Roll the dough into 1-inch balls. Place them about 2 inches apart on the prepared baking sheets.
Step 7: Bake Cookies
Bake in the preheated oven for 9-11 minutes or until edges are lightly golden and centers are set.
Step 8: Press in Peanut Butter Cups
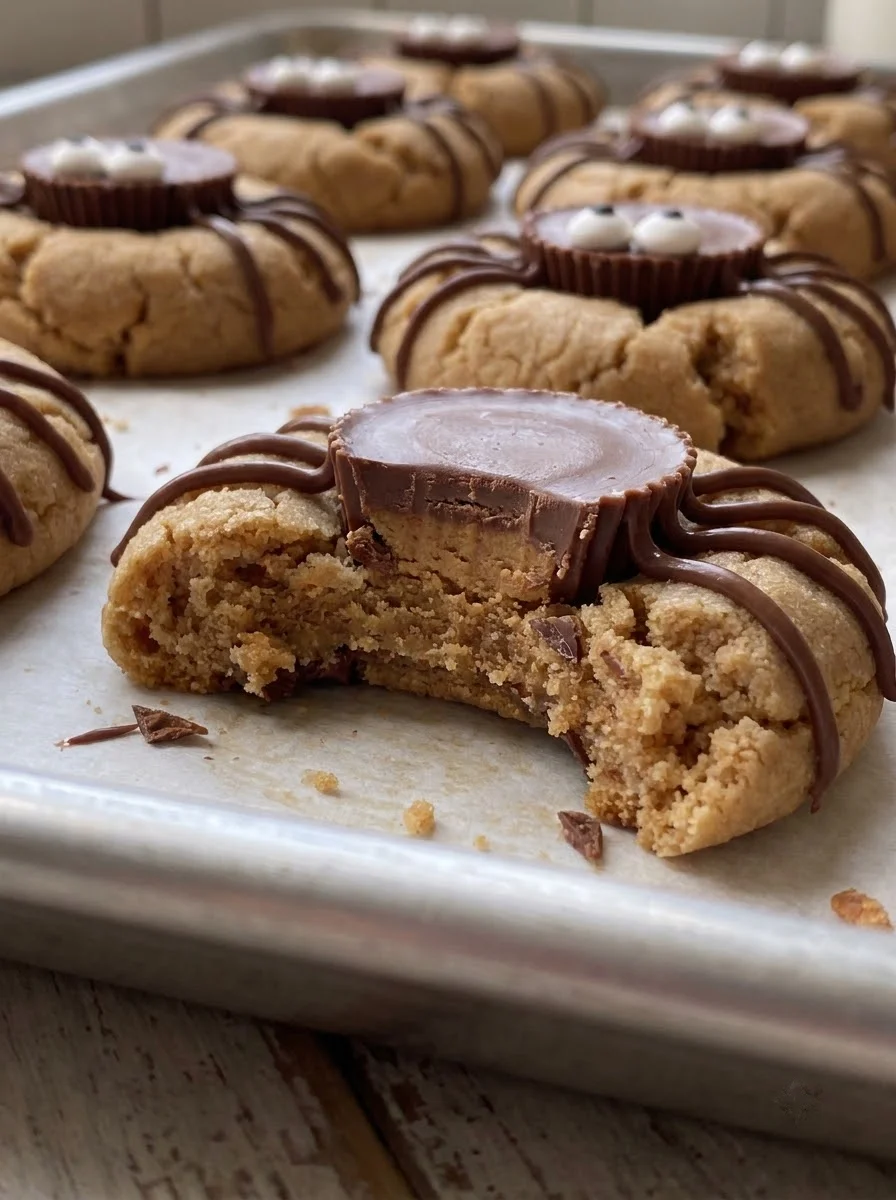
Remove from oven and immediately press one unwrapped miniature peanut butter cup into the center of each warm cookie. Let them cool on the baking sheets for about 5 minutes before transferring to a wire rack to cool completely.
Step 9: Melt Chocolate Chips
Once cooled, melt semi-sweet chocolate chips either in a microwave-safe bowl in short intervals or using a double boiler until smooth.
Step 10: Prepare Chocolate for Decorating
Transfer melted chocolate into a small piping bag or plastic zipper bag with one corner snipped off.
Step 11: Decorate with Candy Eyes
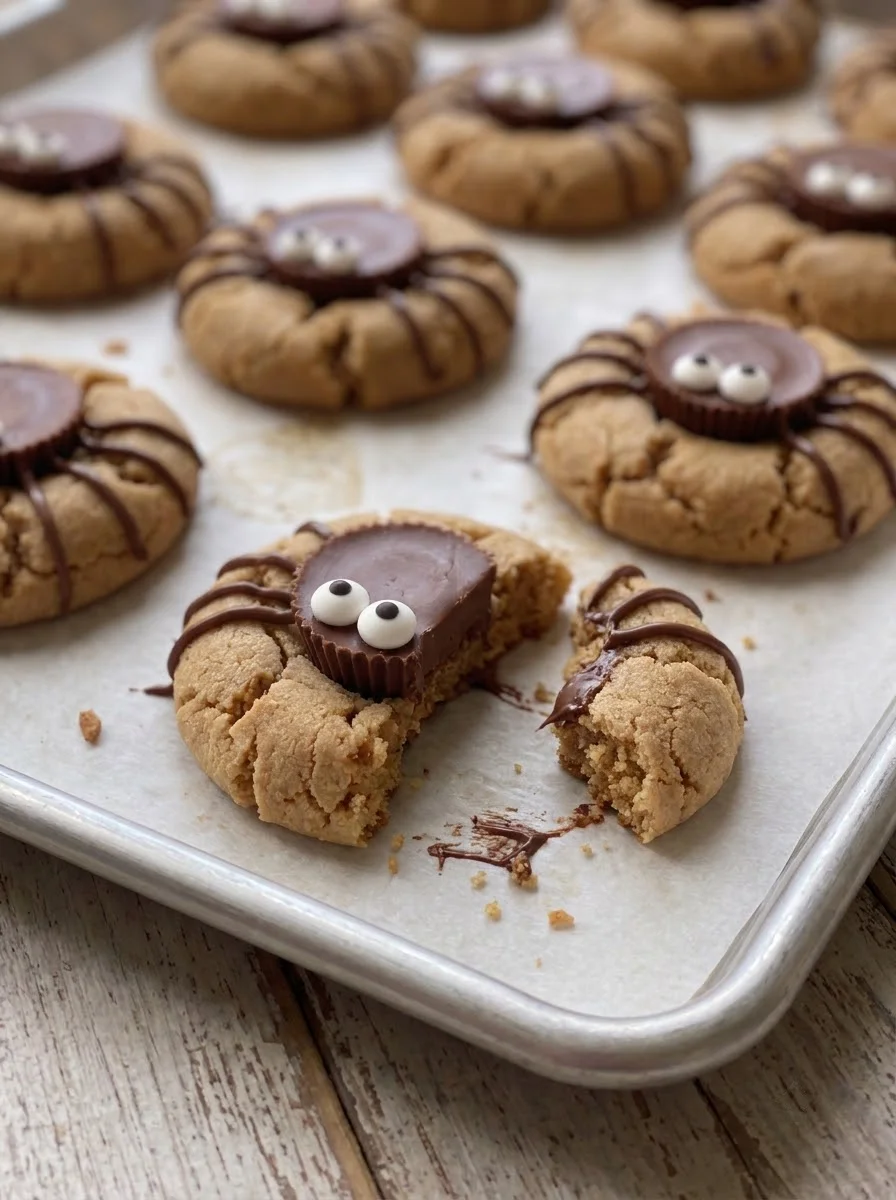
Use melted chocolate to attach two candy eyes onto each miniature peanut butter cup.
Step 12: Create Spider Legs
Pipe four small lines extending out from each side of the peanut butter cup onto the cookie to create legs of the spider.
Step 13: Allow Chocolate to Set
Let the chocolate decorations set completely before serving or storing your Spider Peanut Butter Cookies.
How to Serve Spider Peanut Butter Cookies
Serving Spider Peanut Butter Cookies can be a delightful experience, perfect for Halloween parties or as a fun dessert treat any time of the year. Here are some creative serving suggestions to enhance your cookie presentation.
Creative Platter Ideas
- Halloween-Themed Plates: Use plates with spooky designs to enhance the festive feel.
- Cookie Stands: Arrange cookies on tiered stands for an eye-catching display at parties.
Pairing Suggestions
- Milk: Serve with a glass of cold milk for a classic combination that complements the peanut butter flavor.
- Hot Cocoa: Pair these cookies with hot cocoa, topped with marshmallows, for a cozy treat on chilly nights.
Fun Garnishes
- Sprinkles: Add orange and black sprinkles around the cookies for extra flair.
- Chocolate Drizzle: For added decadence, drizzle extra melted chocolate over the cookies before serving.
How to Perfect Spider Peanut Butter Cookies
To achieve the best results with your Spider Peanut Butter Cookies, consider these helpful tips.
- Temperature Check: Ensure your butter is at room temperature to achieve a light and fluffy cookie texture.
- Measure Flour Accurately: Spoon flour into your measuring cup instead of scooping it directly to avoid dense cookies.
- Don’t Overbake: Keep an eye on the baking time; remove them when edges are golden but centers are still soft.
- Chill Dough if Needed: If your dough is too sticky, chill it in the fridge for 30 minutes before rolling into balls.
- Let Chocolate Set Properly: Allow enough time for the melted chocolate to set for better presentation and easier handling.
Best Side Dishes for Spider Peanut Butter Cookies
Pairing side dishes with your Spider Peanut Butter Cookies can create an unforgettable dessert experience. Here are some delicious options.
- Pumpkin Spice Latte: This seasonal favorite complements the rich flavors of peanut butter perfectly.
- Apple Cider Donuts: The cinnamon-sugar coating adds a delightful balance to the sweetness of the cookies.
- Fruit Salad: A fresh mix of fruits can provide a refreshing contrast to the richness of peanut butter cookies.
- Cheesecake Bites: Small bites of cheesecake offer creamy indulgence that pairs well with the crunchy cookie texture.
- Chocolate-Covered Pretzels: Salty and sweet, these treats enhance the flavor profile while adding crunch.
- Caramel Popcorn: The sweetness and crunch of caramel popcorn make for a fun snack alongside cookies.
Common Mistakes to Avoid
When making Spider Peanut Butter Cookies, it’s easy to overlook some details. Here are common mistakes to watch out for.
- Not measuring ingredients accurately: Always use precise measurements for your ingredients. This ensures the right texture and taste.
- Overmixing the dough: Mixing too much can make cookies tough. Mix just until combined for a soft, chewy cookie.
- Using cold butter: Cold butter doesn’t cream well with sugars. Make sure your butter is softened to achieve a light and fluffy mixture.
- Skipping the cooling time: Allow cookies to cool before decorating. This prevents the chocolate from melting too much and helps maintain the design.
- Not preheating the oven: Baking in an unpreheated oven can lead to uneven baking. Always preheat your oven for consistent results.
Refrigerator Storage
- Store cookies in an airtight container. They will stay fresh for up to 1 week.
- Place parchment paper between layers of cookies if stacking them to avoid sticking.
Freezing Spider Peanut Butter Cookies
- Freeze cookies in a single layer on a baking sheet first, then transfer them to a freezer-safe container or bag.
- They can be stored in the freezer for up to 3 months.
Reheating Spider Peanut Butter Cookies
- Oven: Preheat to 350°F and warm cookies for about 5 minutes for that fresh-baked taste.
- Microwave: Heat individual cookies for about 10-15 seconds. Be careful not to overheat!
- Stovetop: Place cookies in a skillet over low heat, covering them with a lid for about 1-2 minutes.
Frequently Asked Questions
What makes Spider Peanut Butter Cookies special?
Spider Peanut Butter Cookies are unique due to their fun spider design, making them perfect for Halloween parties or festive gatherings.
Can I customize the decorations?
Absolutely! You can use different candies or sprinkles to create various designs, allowing you to personalize your Spider Peanut Butter Cookies.
How do I ensure my cookies are chewy?
To achieve chewy cookies, avoid overbaking and allow them to cool completely before storing. This helps retain moisture.
Are Spider Peanut Butter Cookies gluten-free?
No, this recipe uses all-purpose flour, which contains gluten. However, you can substitute with gluten-free flour blends if needed.
What is the best way to store leftover cookies?
Store leftover Spider Peanut Butter Cookies in an airtight container at room temperature or refrigerate them for extended freshness.
Final Thoughts
Spider Peanut Butter Cookies are not only delightful but also incredibly versatile. These treats bring joy and creativity into any festive occasion. Feel free to customize your decorations based on your preferences or seasonal themes!

Spider Peanut Butter Cookies
- Total Time: 30 minutes
- Yield: Makes approximately 24 cookies 1x
Description
Spider Peanut Butter Cookies are a delightful treat perfect for Halloween or any fun occasion. These whimsical cookies feature a soft, chewy peanut butter base topped with a mini peanut butter cup and adorned with candy eyes and chocolate drizzle to create an adorable spider design. They are not only visually appealing but also irresistibly delicious, making them a hit among kids and adults alike. Whether you’re hosting a Halloween party or simply looking for a fun baking project, these cookies will add festive cheer to your dessert table.
Ingredients
- 1/2 cup unsalted butter, softened
- 1/2 cup granulated sugar
- 1/2 cup packed light brown sugar
- 1/2 cup creamy peanut butter
- 1 large egg
- 1 teaspoon vanilla extract
- 1 1/2 cups all-purpose flour
- 1 teaspoon baking soda
- 1/2 teaspoon salt
- 24 miniature peanut butter cups, unwrapped
- 1/4 cup semi-sweet chocolate chips
- 48 candy eyes
Instructions
- Preheat oven to 350°F and line two baking sheets with parchment paper.
- Cream together softened butter, granulated sugar, and light brown sugar until fluffy.
- Mix in creamy peanut butter, egg, and vanilla extract until well combined.
- In a separate bowl, whisk together flour, baking soda, and salt. Gradually add to the wet mixture until combined.
- Roll dough into 1-inch balls and place on prepared baking sheets.
- Bake for 9-11 minutes until edges are golden. Press a peanut butter cup into the center of each warm cookie.
- Let cool for 5 minutes on the sheets before transferring to a wire rack.
- Melt chocolate chips and use to attach candy eyes to each cookie. Pipe legs with chocolate on either side of the peanut butter cup.
- Allow the chocolate to set before serving.
- Prep Time: 20 minutes
- Cook Time: 10 minutes
- Category: Dessert
- Method: Baking
- Cuisine: American
Nutrition
- Serving Size: 1 cookie (approximately 28g)
- Calories: 130
- Sugar: 10g
- Sodium: 90mg
- Fat: 6g
- Saturated Fat: 3g
- Unsaturated Fat: 3g
- Trans Fat: 0g
- Carbohydrates: 18g
- Fiber: <1g
- Protein: 3g
- Cholesterol: 15mg